Exporting Movies
Introduction
A movie can be exported from Video Sync with or without embedded overlays, and with any preferred audio content. This is useful for sharing work-in-progress music cues with a director for review, supplying stems or mixes to other composers or orchestrators, providing video with embedded streamers or markers to a conductor or music editor, delivering a reference version with timecode or other overlays burnt in for sync verification, and allowing sound supervisors to share director's notes or specific guidance with sound editors and designers as markers embedded in the video.
Exporting a Movie
To export a movie, first make a selection in the active Timeline - either by dragging in the Timeline, by clicking on one or multiple video files in the Timeline, or by entering values in the Timeline selection In & Out Timecode fields on the Controller Bar. If no selection is made, the In and Out Points can still be entered numerically in the export window.
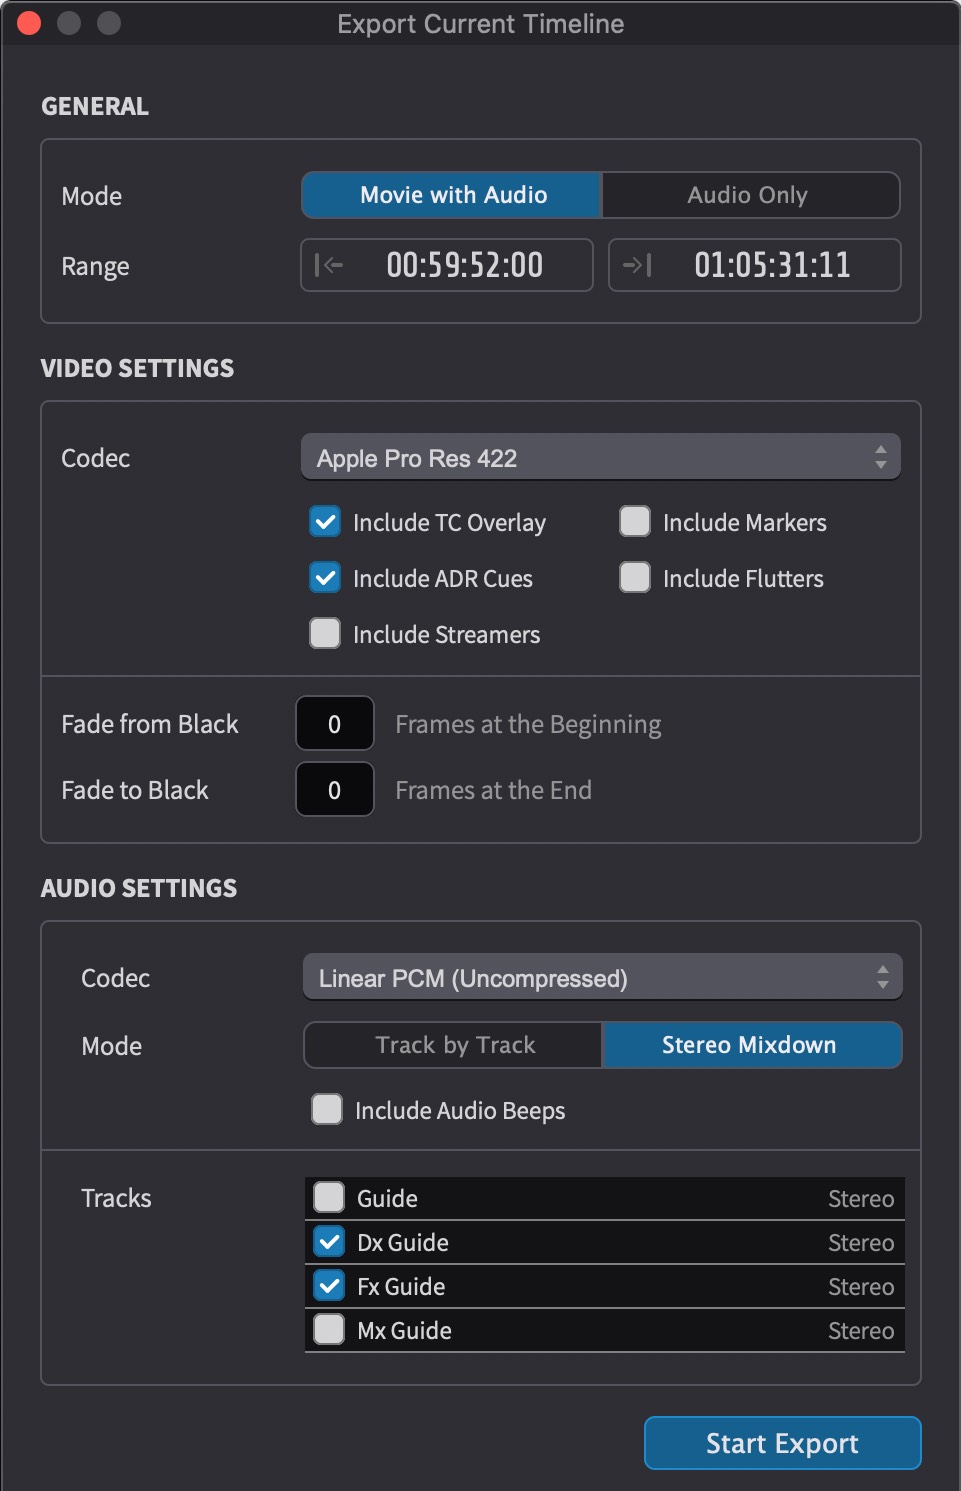
Go to File → Export → Active Timeline. The Export Current Timeline window appears, split into three sections: GENERAL, VIDEO SETTINGS and AUDIO SETTINGS.
Note: The Active Timeline export option is only available when the Timeline contains video. If the exported range includes sections with no video on the Timeline, those sections are exported as black video with any active overlays still rendered.
 {width=60%}
General
In the GENERAL section, set the Mode to choose whether to export video and audio together, or audio only.
Set the Range to define the timecode range to export. By default, this is set to the selection made in the Timeline.
Note: Selections and event ranges are treated as exclusive at the end. The end timecode marks the first frame after the selection or event - the range includes the start timecode but does not include the frame at the end timecode.
Video Settings
In the VIDEO SETTINGS section, choose a Codec for the exported video. The available codecs are H.264, H.265/HEVC and Apple ProRes (LT, Standard or HQ).
Use the Overlays checkboxes to select which overlay types (Visual Events) to embed in the export. Only the overlay categories enabled here are rendered into the exported movie.
Set the Fade In/Out at In/Out Points values to add picture fades - the number of frames of fade in from black at the start, and fade out to black at the end of the exported range.
Audio Settings
In the AUDIO SETTINGS section, choose an audio Codec - either PCM (uncompressed) or AAC (compressed).
Set the Mode to either Stereo Mixdown or Track by Track. Stereo Mixdown folds the selected audio tracks down to a single stereo pair and is recommended when creating review versions, as not all media players handle multiple audio tracks well. Track by Track includes each selected audio track as a separate track in the output movie.
Enable Include Audio Beeps to include Streamer audio beeps in the exported movie. The beep volume is taken from the setting in the Audio Settings window.
Use the Tracks checkboxes to select which audio tracks to include in the export.
Starting the Export
Once all settings are configured, click the Start Export button. Choose an export location in the window that appears. The export begins, showing a progress indicator and an estimated remaining export duration.